> For the complete documentation index, see [llms.txt](https://docs.bloomanalytics.io/llms.txt). Markdown versions of documentation pages are available by appending `.md` to page URLs; this page is available as [Markdown](https://docs.bloomanalytics.io/bloom-pixel-custom-domain/setting-up-the-bloom-custom-pixel.md).
# Setting Up The Bloom Custom Pixel
### Step 1: Adding a Custom Domain
To set up your custom domain bloom.minimax.com.au, follow these steps:
#### 1. Create the subdomain bloom.minimax.com.au and add the following CNAME record:
```
Name: bloom.minimax.com.au
Value: pixel.bloominsights.io
```
#### 2. Add the ACME challenge CNAME record:
```
Name: _acme-challenge.bloom.minimax.com.au
Value: bloom.minimax.com.au.5179df691247841b.dcv.cloudflare.com
```
Once both records have been added, please notify us so we can configure event routing for your domain.
### Step 2: Implement the Bloom Custom Pixel
To add the Bloom custom pixel to your Shopify store, follow these steps:
1. Log in to your Shopify admin panel and navigate to **Settings > Customer events**.
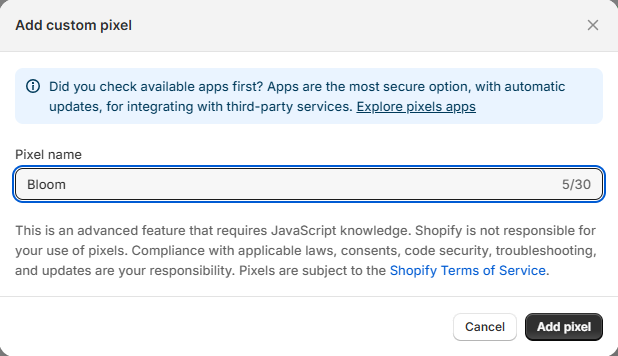
2. Click on **" Add custom pixel"**
3. Provide a custom name for your pixel. You’ll be prompted to change it if it’s already in use.
4. Update the privacy setting.
5. Clear any existing code and paste the BloomPixel Customer Events JavaScript code shown below.
```
analytics.subscribe("checkout_completed", async (event) => {
try {
const checkout = event.data.checkout;
const visitorId = document.cookie
.split(';')
.find(c => c.trim().startsWith('bloom_tracker_v10='))
?.split('=')[1] || null;
await fetch('https://bloom.minimax.com.au', {
method: 'POST',
headers: { 'Content-Type': 'application/json' },
body: JSON.stringify({
event: 'checkout_completed',
url: event.context?.document?.location?.href,
cookie_value: visitorId,
event_payload: JSON.stringify({
orderId: checkout.order?.id,
checkoutToken: checkout.token
}),
source: 'CustomBloomPixel',
shop: event.context?.document?.location?.host,
storeFrontURL: event.context?.window?.origin,
buyerEmail: checkout.email
}),
keepalive: true
});
} catch (error) {
console.error('Bloom tracking error:', error);
}
});
```
6. **Save your changes** and verify that the pixel is firing correctly on your storefront.